How to Use Multi-Factor Authentication

Add an extra level of security to your important document transactions by utilizing multi-factor authentication when accessing your account.
Multi Factor Authentication

Using Multi-Factor Authentication - A Step by Step Guide

Personal, Standard, and Business users will need to authenticate their accounts when using a phone number to log in. Enterprise users will be able to choose between a phone number or email address for authentication. Account verification will be a one-time requirement, except if you haven't accessed the platform for 7 days or have logged in from a different IP address or device.

Step 1

Go to your E-Sign account settings to update your multi-factor authentication settings.
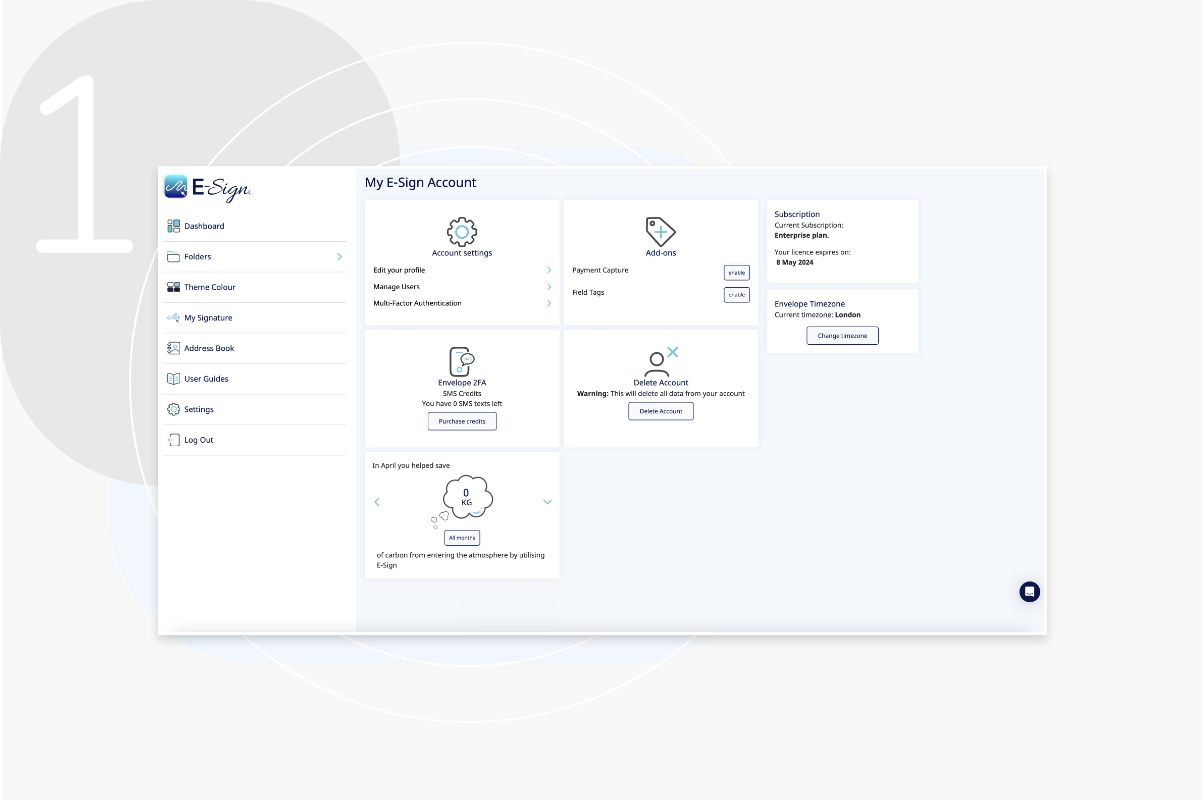
Update Your Multi Factor Authentication Settings

Step 2

When you click the multi-factor authentication option, a pop-up message will ask you to input your account password to view these settings.
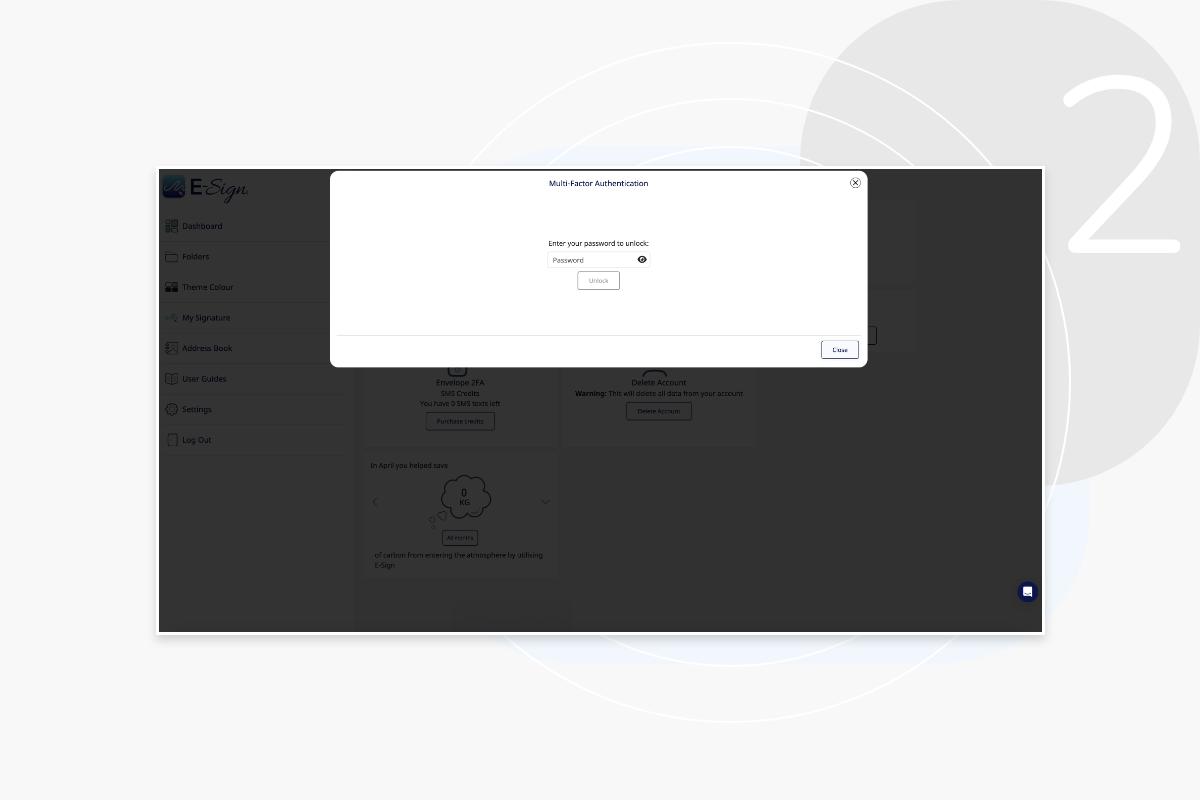
View Multi Factor Authentication Options

Step 3

You will now be able to enter the phone number you want to use for account verification.
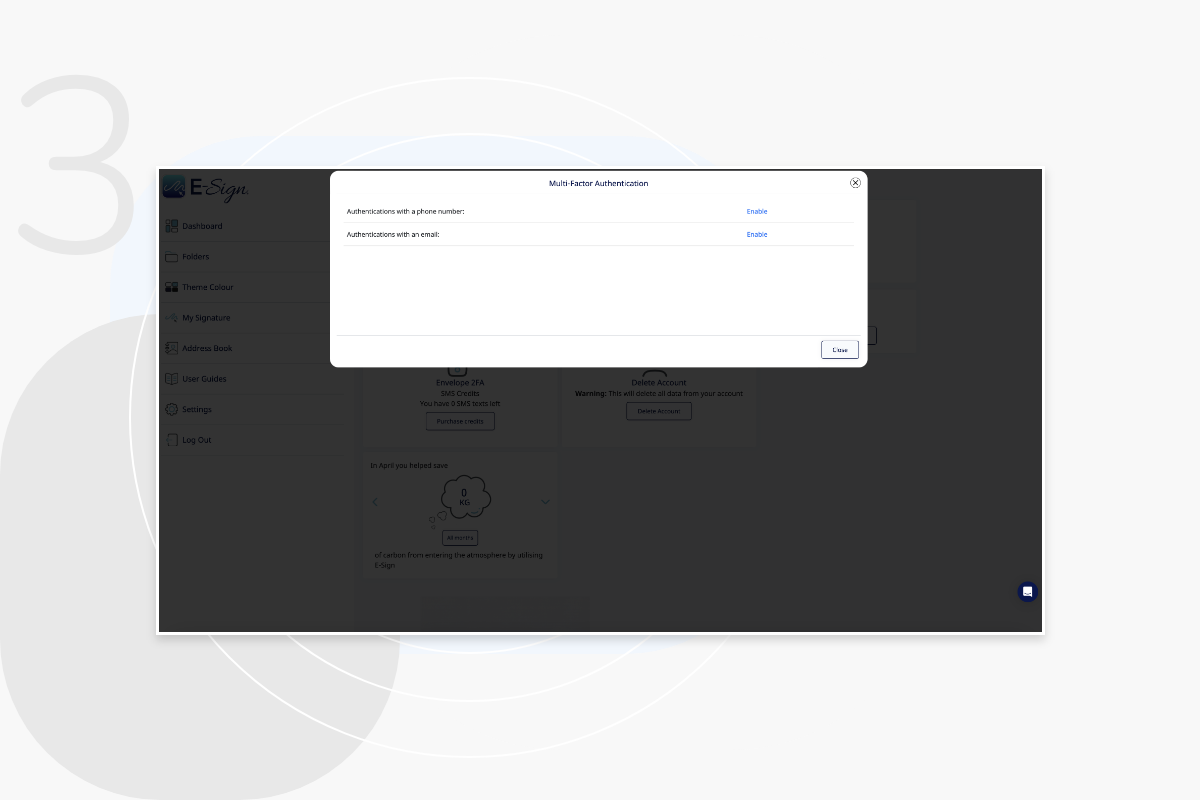
Verify Your Account With Multi-Factor Authentication

Step 4

Once the settings have been updated, you will be required to your phone number. You should then receive a text message with a One Time Passcode (OTP) to verify the number. 
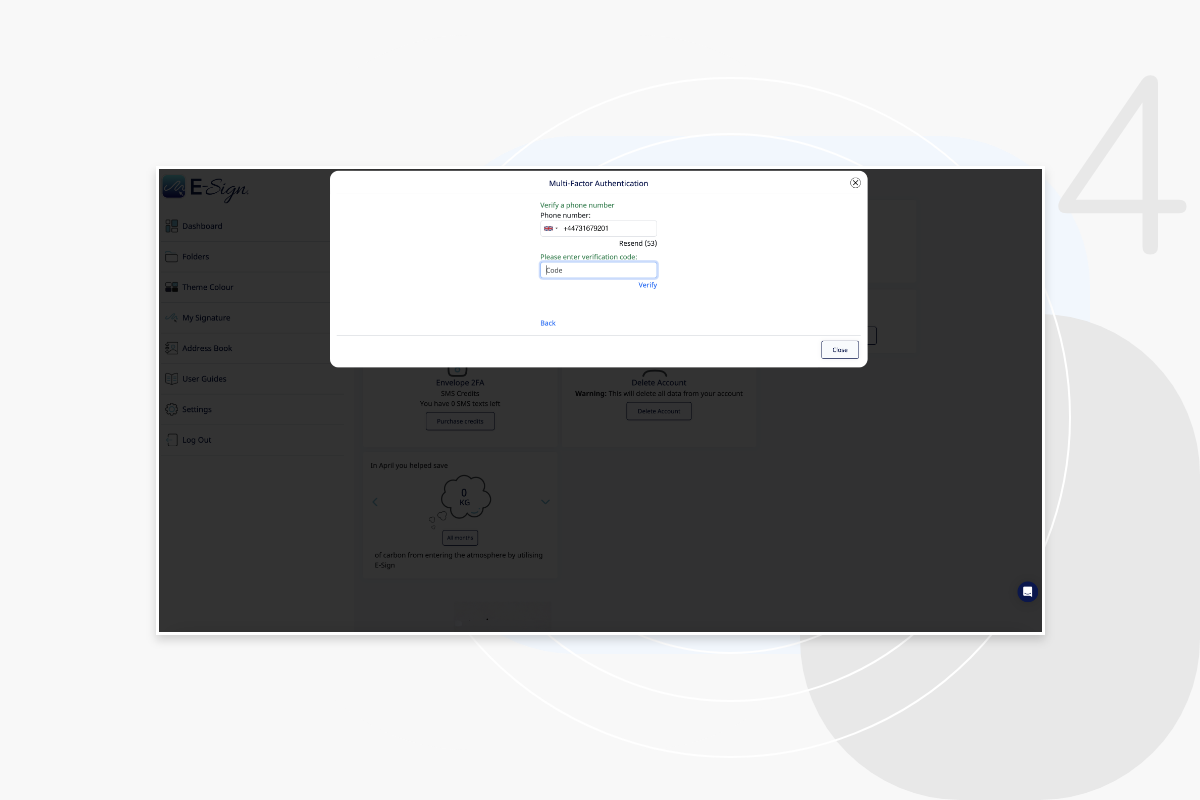
Multi Factor Authentication eSign Passcode

Step 5

When you have updated your multi-factor authentication settings, they will be saved. This means you will only need to authenticate once, unless you haven’t logged in for 7 days, or you have logged in from a different IP address/device. 
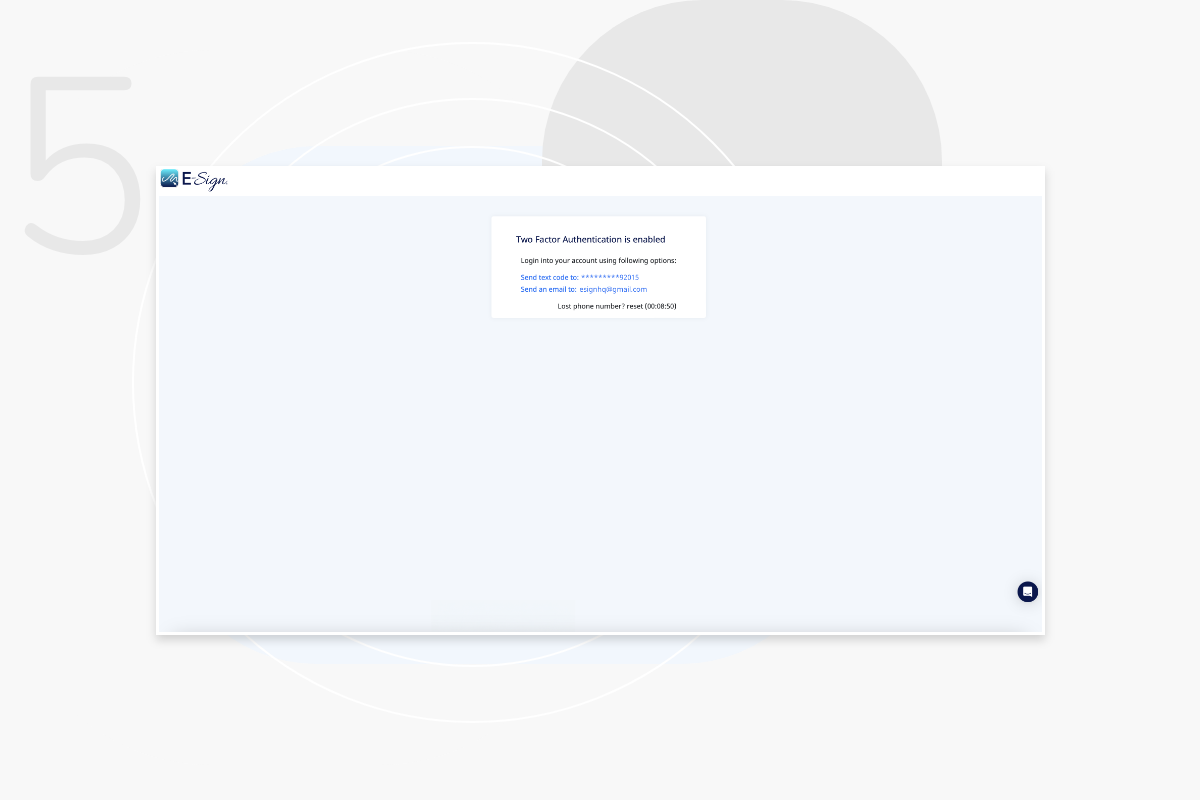
Save Multi Factor Authentication Settings

Contact eSign Today

Please contact our expert team for further support or queries.
Get in Touch With Us

Accreditations & Awards

ISO 9001 Quality Management
ISO 27001 Information Security Management
eSign Digital Winner UK
2023 SME Committed Badge
Cyber Essentials Plus

Reviews & Security

Trustpilot_Logo_2022.svg
Secure Trusted Commerce
Rapid SSL Logo
Viking Cloud Logo
Select Language